When Office 365 was released, provisioning accounts with DirSync was the only available method. There was no support for Powershell which was unfortunate. Since then Microsoft has released Powershell support and readily documentation. This article describes a quick way to create an account in Office 365 using Powershell.
To begin using the Office 365 cmdlets, you first need to install them. This is described under section Install the Office 365 cmdlets. Use x64 and make sure you set ExecutionPolicy to RemoteSigned.
Set-ExecutionPolicy RemoteSigned
Then you need to import Powershell module for Office 365.
Import-Module MSOnline
Create a session.
$Username = "admin@mydomain.onmicrosoft.com"
$Password = ConvertTo-SecureString "P@ssword" -AsPlainText -Force
$Credentials = New-Object System.Management.Automation.PSCredential $Username,$Password
Connect-MsolService -Credential $Credentials
Create a new User.
New-MsolUser -UserPrincipalName johndoe@mydomain.onmicrosoft.com -DisplayName "John Doe" -FirstName "John" -LastName "Doe"
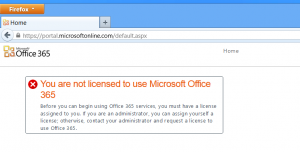
New-MsolUser will create a random password and return a MsolUser object which contains the new password. However, when logging in to the portal, user will face an error message.
This is beacuse a user needs to be assigned to a subscription. To do this UsageLocation nedds to be set and second a license added:
Set-MsolUser -UserPrincipalName johndoe@mydomain.onmicrosoft.com -UsageLocation "US"
Set-MsolUserLicense -UserPrincipalName johndoe@mydomain.onmicrosoft.com -AddLicenses "tengil:ENTERPRISEPACK"
It is possible (and recommended) to create a user with a license in a single call.
New-MsolUser -UserPrincipalName johndoe@mydomain.onmicrosoft.com -DisplayName "John Doe" -FirstName "John" -LastName "Doe" -UsageLocation "US" -LicenseAssignment "Contoso:BPOS_Standard"
A simple script to summarize this:
param(
[parameter(Mandatory = $true)][string]$AdminUsername,
[parameter(Mandatory = $true)][string]$AdminPassword,
[parameter(Mandatory = $true)][string]$UserPrincipalName,
[parameter(Mandatory = $true)][string]$DisplayName
[parameter(Mandatory = $true)][string]$FirstName,
[parameter(Mandatory = $true)][string]$LastName,
[parameter(Mandatory = $true)][string]$UsageLocation,
[parameter(Mandatory = $true)][string]$LicenseAssignment
)

function New-O365User()
{
if((Get-Module MSOnline) -eq $null)
{
Import-Module MSOnline
}

$pwd = ConvertTo-SecureString $AdminPassword -AsPlainText -Force
$Credentials = New-Object System.Management.Automation.PSCredential $AdminUsername,$pwd
Connect-MsolService -Credential $Credentials

New-MsolUser -UserPrincipalName $UserPrincipalName -DisplayName $DisplayName -FirstName $FirstName -LastName $LastName -UsageLocation $UsageLocation -LicenseAssignment $LicenseAssignment

}

New-O365User -AdminUsername $AdminUsername -AdminPassword $AdminPassword -UserPrincipalName $UserPrincipalName -DisplayName $DisplayName -FirstName $FirstName -LastName $LastName -UsageLocation $UsageLocation -LicenseAssignment $LicenseAssignment

